
Replace the PDMS Coating on Your Form1 Printer VAT

The following method to change the PDMS Coating for your FORM1 Printer VAT.
This should save you quite a bit of cash on new vat purchases.
For those of you who have changed PDMS before, and don’t need detailed instructions, just mix together about 88mL of Sylgard 184. The ratio is 10 to 1. When you take the non-stick coating out of a Form1 vat, you will notice that it weighs about 84grams, and the hard math on the volume of the layer performed with calipers is about 87mm^3.
Seeing as you will lose an mL or so through your various transfers, 88mL is a good target. Skip down to step 7 below for ways to speed up the cure time.
For everyone who needs more detailed instructions, here are the steps we took to change out our non-stick coating:
1. Level a table or workbench :
It’s CRUCIAL that you are using a level surface, otherwise, your PDMS will be crooked. Download a leveling app on your phone if you don’t have a level handy.
2. Cut the old layer of PDMS :
Take a razor and cut into the old layer of PDMS in your Form1 vat. I suggest cutting into one of the corners to avoid scratching any crucial pieces of acrylic.
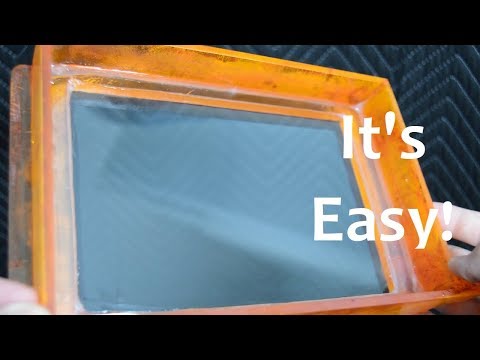
3.Lift the PDMS out of the vat :
Use something strong and straight, like scissors or tweezers, to lift the PDMS out of the vat once you have cut the corner. It should all come out together, and it will not stick to the vat as there is no layer of adhesive under it.
4. Mix Sylgard 184 :
Mix about 88mL Sylgard 184 Base and Agent in a 10 to 1 ratio. We mixed 80mL of Base (the big tub) with 8 mL of Agent (the little bottle). Mix for 3 to 5 minutes, until the mixture is full of bubbles and all the transparency has been lost.
5. Pour the Sylgard 184 :
you’ve mixed into the Form1 vat that is sitting on a level surface (please use a level surface). Use your stirring utensil to scrape as much of the Sylgard out of your mixing cup and into the vat as you can.
6. keep it clean
Cover the vat with a clean sheet a paper or piece of cardboard to keep any dust-out.
The vat needs to sit for 48-hours at room temperature to fully cure unless you have the ability to complete the next step, which involves speeding up the cure time using heat.
After 48-hours, you are ready to print with your vat. Use your finger to make sure the surface on the new PDMS layer is cured all the way. It should be solid but elastic and should not be sticky.
7. Speeding up the cure time:
The silicon will take 48-hours to cure at room temperature, but it will cure faster at warmer temperatures. If you have a dehydrator, hotbox, or low-temperature oven, you can speed up your cure time to a few hours.
Make sure that whatever method you utilize, the temperature is no warmer than 180° Fahrenheit as you will begin to weaken your vat.
Before you heat your vat, you need to confirm that there are NO BUBBLES left in the PDMS. Over time, all the bubbles should come to the surface and pop. If there are still bubbles in your PDMS, let it sit a while longer before applying heat. We utilize a homemade hotbox that involves a dehydrator and some aluminum shielding (see picture below). This combination heats the vat to about 140° F and fully cures the vat after 2-hours.
Result :
After the Form1 with new vat, we revived using this method. You will note that there was no decrease in quality versus using a new vat.
Good luck with your vat revival. Feel free to reach out if you have any questions we will be happy to help.
Source : blog.madesolid.com